Friday, December 30, 2016
Massaged Kale and Craisin Salad with Feta Cheese
The only thing I have in my winter garden right now is kale, and it is thriving. This salad is such a yummy way to use up the kale. I love it!!
Massaged Kale and Craisin Salad with Feta Cheese
Ingredients:
1 bunch kale
3/4 teaspoon coarse kosher salt
1/4 cup finely diced red onion
1/2 cup craisins
3/4 cup small diced apple
1/3 cup toasted sunflower seeds
1/4 cup olive oil
2 tablespoons red wine vinegar
1/2 teaspoon sugar
1/3 cup crumbled Feta cheese
Directions:
1. Wash the kale and pat it dry. Slice off the stiff stems below and in the middle of the kale leaves. This should create a thin "V" in the middle of your leaf. You want to remove all the stiff stem. Slice the remaining kale leaves into thin strips.
2. Place the kale ribbons in a large mixing bowl. Add the salt and massage it into the kale with your hands for about two minutes.
3. Toss in the red onions, craisins, apples, sunflower seeds. In a small bowl, whisk together the oil, vinegar, and sugar. Pour over the salad and toss. Sprinkle Feta cheese over the top and serve. This salad holds quite well overnight too. Don't be afraid of saving it for leftovers.
Serves: 6
Recipe Source: My SIL Shalae who got it from Mel's Kitchen Cafe
Labels:
gluten free,
salad,
side dish,
vegetarian,
winter
Wednesday, December 28, 2016
Egg Nog French Toast
I created this over Christmas break so that my family would help me finish the Egg Nog. Nobody in my family of 6 likes Egg Nog except for me....and hello...have you seen how many delicious calories there are in Egg Nog? My body can't afford to drink it all by myself. So I made this French Toast, and everyone loved it! Hooray!
Egg Nog French Toast
Ingredients:
1 1/2 cups Egg Nog
1/2 cup milk
4 eggs
1 tsp. cinnamon
1/2 tsp. nutmeg
1 loaf of french bread
Directions:
Whisk together Egg Nog, milk, eggs, cinnamon, and nutmeg until eggs and spices are well blended. Slice french bread into 3/4 inch thick slices. Dip each slice of bread in the egg nog mixture and place on griddle. Flip and cook on the other side. Enjoy with this cinnamon syrup.
Egg Nog French Toast
Ingredients:
1 1/2 cups Egg Nog
1/2 cup milk
4 eggs
1 tsp. cinnamon
1/2 tsp. nutmeg
1 loaf of french bread
Directions:
Whisk together Egg Nog, milk, eggs, cinnamon, and nutmeg until eggs and spices are well blended. Slice french bread into 3/4 inch thick slices. Dip each slice of bread in the egg nog mixture and place on griddle. Flip and cook on the other side. Enjoy with this cinnamon syrup.
Sunday, January 10, 2016
Oatmeal Pancakes
So it's the beginning of 2016, and we have jumped on the "Let's get healthy" bandwagon. My hubs and I are doing a health challenge where you can't have any sugar (except for 1 cheat day a week), and we have to eat a certain amount of fruits and veggies everyday among other things. These pancakes were such a delicious way to start the morning and get our fruit in. Plus the kids all like them too. Another bonus is that they are super filling. You don't feel like you are starving in an hour or even two hours. I LOVE these pancakes!
Oatmeal Pancakes
Ingredients:
1 cup rolled oats
1 cup whole wheat flour
1/2 cup wheat germ
1 tsp. soda
1/2 tsp. salt
1 Tbs. honey
2 eggs
2 1/4 cup lowfat buttermilk
1/4 cup unsweetened applesauce
Directions:
Mix dry ingredients together in a large mixing bowl. Mix wet ingredients together in a medium mixing bowl. Then add wet ingredients to dry ingredients. Stir until barely mixed. (The more you mix, the less fluffy the pancakes will be.) Cook on a griddle or frying pan that has been sprayed with cooking spray.
Makes 12 pancakes (using 1/3 cup batter per pancake)
Nutritional Information:
Serving Size: 1 Pancake; Calories: 112; Fat: 2.4 g; Fiber: 2.5 g; Protein: 6 g; Carbs: 16.5 g
Recipe Source: Slightly Adapted from my Mom's Family Cookbook
Saturday, February 28, 2015
Coconut Syrup
The one, the only, coconut syrup! This baby deserves it's own post because it is so delicious! My kids are to the point of refusing pancakes unless this syrup is on them. It is everybody's favorite syrup in this household. I even catch my kids trying to drink it straight from the bottle. It is fantastic stuff and you can whip it up in no time.
Coconut Syrup
Ingredients:
1/2 cup butter
3/4 cup buttermilk
1 cup sugar
1/2 teaspoon baking soda
1 teaspoon coconut extract
Directions:
Place butter, buttermilk, and sugar in a medium sized saucepan. Cook over medium heat and stir until butter melts and sugar dissolves. Bring to a boil and boil for one minute. Remove from heat and stir in the soda and extract. It will bubble up. Let it rest for a few minutes before serving.
Recipe Source: The Sister's Cafe
Labels:
breakfast,
gluten free,
pancakes,
wheat free
Wednesday, February 25, 2015
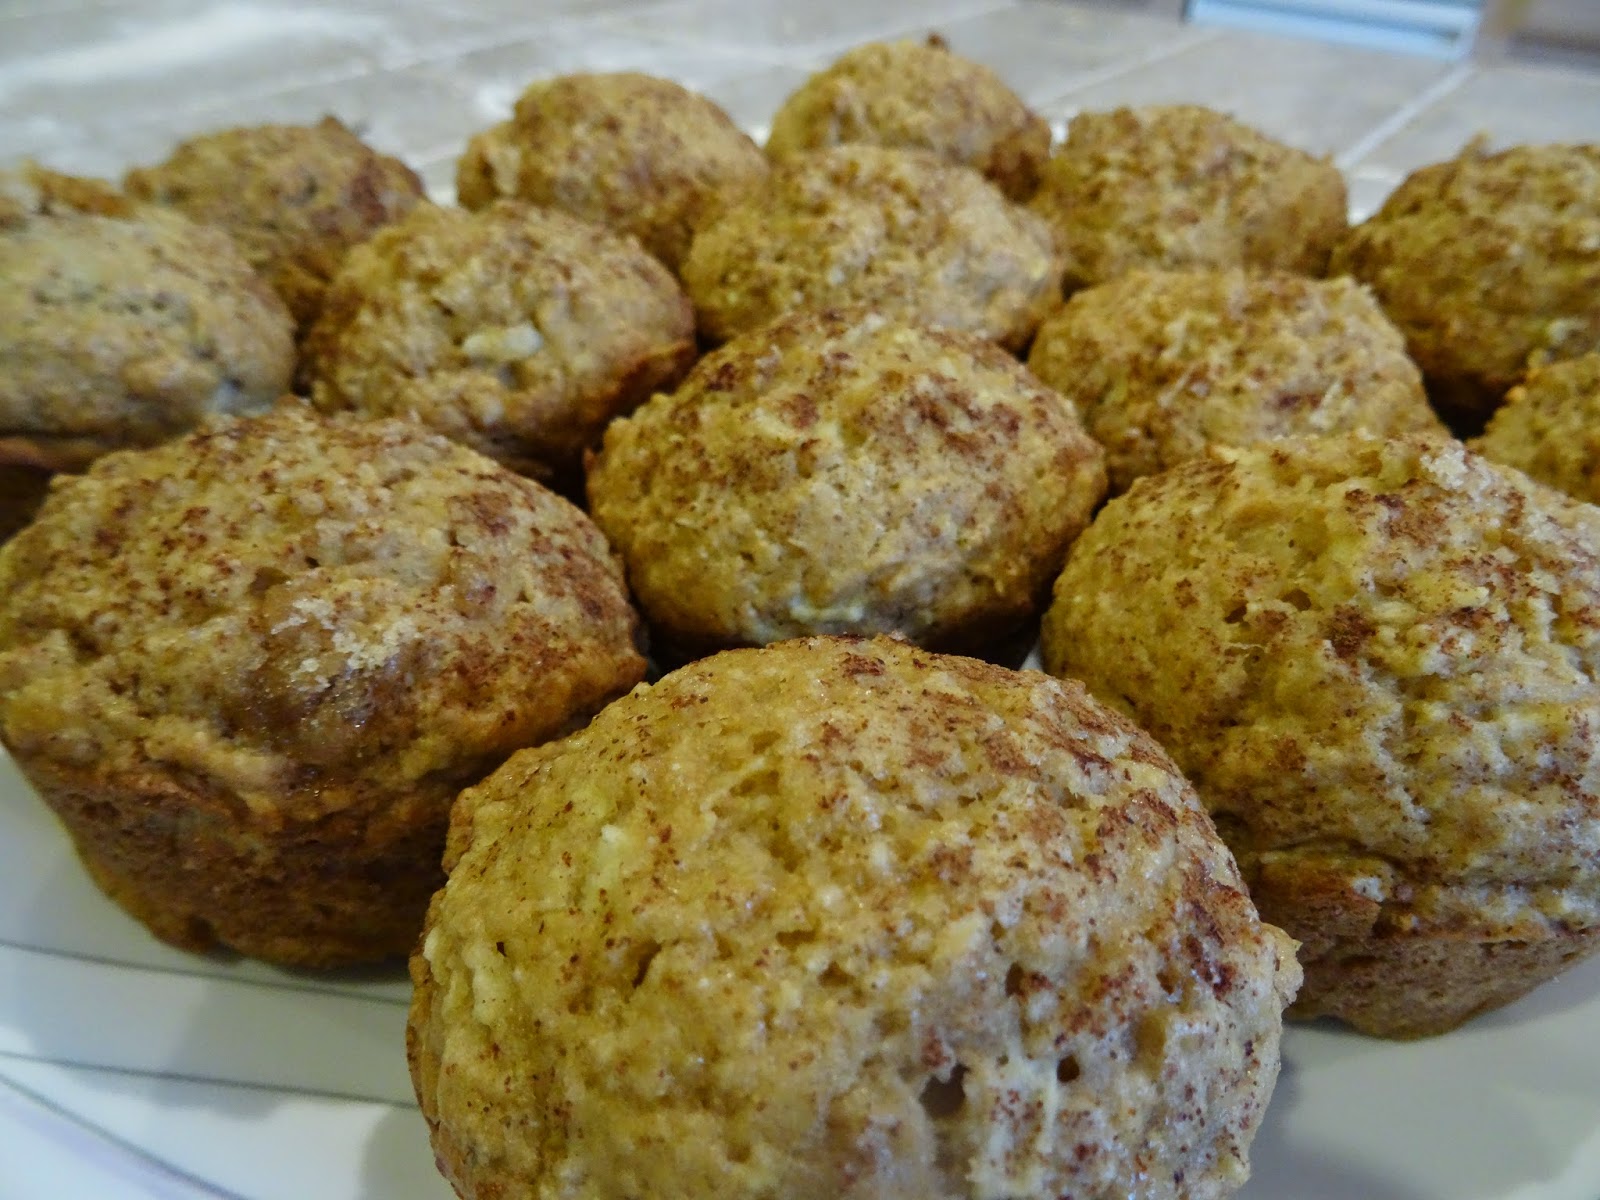
Skinny Apple Muffins
I have always loved muffins! Always! I love eating muffins for breakfast, lunch, snacks...whenever. The only problem is they are usually loaded with sugar and calories. I have adapted this recipe from an apple streusel bread recipe I have to make it lighter so that the kids will still enjoy it, but so that you can also afford to eat more than one for breakfast! Each muffin is just 123 calories!! (I didn't calculate all the other stats, but if you want them, I will make my lazy self calculate it for you!) They are still yummy and my kids love them!
Skinny Apple Muffins
Ingredients:
1 cup whole wheat flour
1 cup white flour
1 teaspoon baking soda
1/4 teaspoon salt
1/2 cup sugar
2 Tablespoons butter, room temperature
2 large eggs
1/2 cup applesauce
1 Tablespoon lemon juice
2 teaspoons vanilla
2 granny smith apples, peeled and grated
cinnamon for sprinkling
brown sugar for sprinkling
Directions:
1. Preheat oven to 350 degrees. Combine flours, baking soda, and salt in a medium bowl.
2. Cream butter, applesauce and sugar in a mixing bowl. Beat in the eggs, lemon juice and vanilla.
3. Add the flour mixture to the butter mixture and stir just until moistened. Add apples and stir gently to combine.
4. Spray a muffin tin with nonstick cooking spray. Spoon the batter into the muffin tin filling each tin 3/4 of the way full.
5. Sprinkle tops of the muffins with cinnamon and brown sugar.
6. Place muffin pan in oven and cook for 20 minutes or until a toothpick inserted in the center comes out clean.
Makes about 14 muffins.
Recipe Source: Kimmy's Creation
Friday, October 17, 2014
Homemade Pumpkin Crescent Rolls
These are so, so yummy and perfect for fall. I love the orange color the pumpkin gives these rolls. Fun for serving with soup or eating plain. This are a delight in your mouth!
Pumpkin Crescent Rolls
Ingredients:
2 1/2 tsp. active dry yeast or 2 packages
1 cup warm water (110-115 F)
1 can (15 oz.) of pumpkin
1/2 cup sugar
1/2 cup butter, softened
1 egg
1 1/2 tsp. salt
5 - 5 1/2 cups flour
extra softened butter for brushing (about 1/4 cup)
Directions:
In a large bowl, dissolve yeast in water; let stand for 5 minutes. Beat in pumpkin, sugar, butter, egg, salt and 3 cups flour. Add enough remaining flour to form a stiff dough. Knead until smooth and elastic, about 6 minutes. Place in a greased bowl, turning once to grease top. Cover and let rise in a warm place until doubled, about 1 hour.
Punch dough down; divide into thirds. Roll each portion into a 12 inch circle; cut each into 12 wedges. Brush with butter. Roll up from the wide end and place pointed end down, 2 inches apart on greased baking sheets. Cover and let rise until doubled, about 40 minutes.
Bake at 375 degrees for 12-15 minutes or until golden brown.
Recipe Source: adapted from a Taste of Home Magazine
Labels:
bread,
fall,
Halloween,
pumpkin,
Thanksgiving
Tuesday, October 7, 2014
Baked Oatmeal
So we have this fantastic little cafe in town called CJ's Cafe (Country Java). Everyone in town raves about their baked oatmeal. So when my sister was visiting from Las Vegas, she bought us all some for breakfast. Let me tell you...it did not disappoint. It was delicious!
I had to find a recipe to recreate their baked oatmeal so we could have it at home often! This reminds me of CJ's. It is such a perfect fall breakfast. It is easy to put together and pop in the oven. My kids absolutely love it and would eat it for breakfast, lunch, and dinner if I gave them the chance. I made this for our family reunion this summer, and it got rave reviews!
I included the basic, original recipe. This recipe can be adapted to you! Last time I made it, I reduced the butter to 2 Tablespoons and replaced the rest with applesauce. It is plenty sweet so you could also reduce the sugar. You could add fruit or nuts before or after cooking. The possibilities are endless! Anyway you have it, I guarantee, you'll love it!
Baked Oatmeal
Ingredients:
3 cups quick-cooking oats
1 cup packed brown sugar
2 teaspoons baking powder
1 teaspoon salt
1 teaspoon ground cinnamon
2 eggs
1 cup milk
1/2 cup butter, melted
Directions:
1. Preheat oven to 350 degrees. In a large bowl, combine oats, brown sugar, baking powder, salt and cinnamon. In another bowl, whisk eggs, milk and butter. Stir into oat mixture until blended.
2. Spoon into a greased 9 inch square baking pan. Bake for 40-45 minutes or until wet. Serve warm with milk poured over the top.
Serves: 9
Recipe Source: Taste of Home
Labels:
breakfast,
brunch,
fall,
gluten free,
wheat free
Sunday, October 5, 2014
Homemade Hot Fudge Sauce
Okay seriously!!! This stuff is stinkin' good. Like take out a spoon and eat it plain good. Like "your Momma warned you about it" good. It is rich and decadent. It makes me salivate. It is soooo very delicious. Pour it over ice cream, dip fruit in it, dip a spoon in it, and life will be that much sweeter!
Hot Fudge Sauce
Ingredients:
1/4 cup + 2 Tablespoons heavy whipping cream
1/3 cup sugar
1/4 cup unsweetened cocoa powder
1/2 cup light corn syrup
2 ounces unsweetened chocolate, chopped
2 Tablespoons butter
4-6 ounces sweet chocolate (ghiradelli, hershey, nestle, whateves!)
1 teaspoon vanilla
Directions:
Bring whipping cream, sugar, cocoa powder, and corn syrup to simmer in a small heavy saucepan. Continue simmering until sugar dissolves, stirring occasionally, about 2 minutes. Add chopped chocolate, butter, and sweet chocolate and stir until melted and smooth. Remove from heat; stir in vanilla. Store leftovers in a glass jar in the refrigerator.
Recipe Source: Olivia Barney, my lovely Momma
Labels:
chocolate,
dessert,
gluten free,
ice cream,
wheat free
Thursday, May 15, 2014
Jam Bars
We had a glow in the dark Easter egg hunt before Easter, and I was looking for some new Bar Recipes to make. Oh my goodness! These were a hit! Everyone raved about them! They were so simple too, and I had everything in my pantry That's my idea of a fantastic dessert! The original recipe called for Raspberry Jam, but I made mine with Homemade strawberry jam. I am sure any kind would be delicious though.
Ingredients:
1 cup Softened Butter¾ cups Sugar
1 whole Egg
½ teaspoons Vanilla
2-½ cups All-purpose Flour
10 ounces, weight Jar Seedless Jam
½ cups Chopped Toasted Pecans Or Walnuts
Directions :
Beat the softened butter and sugar until creamy. Add the egg and vanilla, beating until well blended. Add the flour and beat well. Reserve one cup of this dough and set aside.Press remaining dough into a lightly greased 9×9 pan and press down well and evenly. Spread jam over the top of the dough. Stir the nuts into the remaining one cup of dough and sprinkle this evenly over the jam. Do not press this down.
Bake at 350 degrees for 25-28 minutes or until the top is lightly brown. Let the pan cool completely on a wire rack. Cut and Serve!
Recipe Source: Tasty Kitchen
Labels:
dessert
Tuesday, April 15, 2014
Construction Birthday Cake
Well Howdy y'all! With two birthdays in the family last week, it has been a little crazy busy around the casa! I realized I needed to create a birthday cake and fast for my little 4 year old. He loves cars, airplanes, trucks, cranes, tractors, pretty much anything that moves! I found some ideas online to get the brain started and then created this. It was fast, simple, and easy, and he loved it!!!
I made it the night before his birthday, and he couldn't stop staring at it. He was begging to play with it!
Look at that little guy! He makes me laugh every day! After we sang and blew out candles, he got his wish...to go crazy with the cake!
I guess they all went a little crazy with the cake! They had so much fun with it, and that to me was really worth it. And I will be honest...I couldn't stop eating it. Something about the crunch the little rock candies added to the moist cake was just like a mini birthday party in my mouth. And I gotta be honest, if there is food in front of my face, there is a 90 % chance I will eat it.
The aftermath in the construction zone!
Construction Birthday Cake
Chocolate Cake
Ingredients:
1 box chocolate cake mix
1 small box of instant chocolate pudding
1 cup sour cream
3/4 cup water
3/4 cup oil
4 eggs
Directions:
Mix all ingredients together until well blended. Pour into two 8- or 9-inch cake pans. Bake according to the directions on the cake box. Be sure to check with a toothpick to ensure that the cake is cooked through. Cool cakes. When cool, wrap in plastic wrap and freeze.
Chocolate Buttercream Frosting
Ingredients:
1 lb. powdered sugar
1/3 cup cocoa powder
1/2 cup (1 cube) butter
1 teaspoon vanilla
1/4 cup milk (adjust to get the right consistency)
Directions:
Mix all ingredients until light and fluffy.
Frosting the Cake:
Unwrap the frozen cakes from the plastic wrap. Put a layer of frosting on top of one of the cakes, then stack the other cake on top. Frost the entire cake. This cake is so forgiving, just spread away! After frosting, take a chunk out of the top layer of the cake. Put that below the area it was removed as dirt. Then use Oreo crumbs to create additional piles of dirt on and around the cake. Put piles of Chocolate Rock Candy around the bottom of the cake and a single layer around the top of the cake for a border. Place any type of construction trucks around the cake. (I bought a 5 pack at Wal-Mart for $4.99.) And you're done!!!
Monday, April 7, 2014
Menu Plan for the Week
At church, I work with the girls ages 12-18. One of the things we are learning to do this month is menu plan. I can't believe I have never put a menu plan on my blog. I menu plan EVERY week! Really! I could walk around the grocery store for 3 hours grabbing food and come home without the ingredients to make a single meal if I don't have a plan. Now with a plan, I am on top of the world. I can adapt and totally change the plan if I need to, but this gal needs a plan!!!
I actually menu plan breakfast and dinner. I make breakfast for my kids almost every morning. My mom did this growing up and I loved it! So I have carried on the tradition with my kids. We also have the stipulation that with every meal we have to eat some sort of a fruit or vegetable. My kids are pretty used to it. We have been trying to have our kids learn how to make good food choices and to eat balanced meals. This is one thing that has helped us. Now don't get me wrong, we still love sugar and sweets around here, but they are definitely more limited.
So here's the menu plan for this week, and ya know what? It just so happens that this week we have two birthdays in the house. Par-tay!!!
Monday - Breakfast - Crockpot Oatmeal (We eat this every Monday morning!)
Dinner - Hamburger Stroganoff and Salad
Tuesday - Breakfast - Buttermilk Pancakes, Sausage, Fruit
Dinner - Cajun Chicken Pasta (I need to post this recipe! It is so good, and it is light!)
Wednesday - Breakfast - Omelettes (for hubby's birthday)
Dinner - Butterfly Chicken, Green Bean Casserole
Dessert - Rice Krispies Ice Cream Dessert
Thursday - Breakfast - Yogurt Parfaits
Dinner - Mexican Lasagna
Friday - Breakfast - Cereal and Fruit
Dinner - Left Overs
Saturday - Breakfast - Birthday Cake Pancakes (my 4 year old's birthday breakfast)
Dinner - Out for birthdays
Sunday - Breakfast - Baked Donuts and Fruit
Dinner - Honey Walnut Shrimp and Rice (This is a new recipe we are trying.)
Hope y'all have a great week!
I actually menu plan breakfast and dinner. I make breakfast for my kids almost every morning. My mom did this growing up and I loved it! So I have carried on the tradition with my kids. We also have the stipulation that with every meal we have to eat some sort of a fruit or vegetable. My kids are pretty used to it. We have been trying to have our kids learn how to make good food choices and to eat balanced meals. This is one thing that has helped us. Now don't get me wrong, we still love sugar and sweets around here, but they are definitely more limited.
So here's the menu plan for this week, and ya know what? It just so happens that this week we have two birthdays in the house. Par-tay!!!
Monday - Breakfast - Crockpot Oatmeal (We eat this every Monday morning!)
Dinner - Hamburger Stroganoff and Salad
Tuesday - Breakfast - Buttermilk Pancakes, Sausage, Fruit
Dinner - Cajun Chicken Pasta (I need to post this recipe! It is so good, and it is light!)
Wednesday - Breakfast - Omelettes (for hubby's birthday)
Dinner - Butterfly Chicken, Green Bean Casserole
Dessert - Rice Krispies Ice Cream Dessert
Thursday - Breakfast - Yogurt Parfaits
Dinner - Mexican Lasagna
Friday - Breakfast - Cereal and Fruit
Dinner - Left Overs
Saturday - Breakfast - Birthday Cake Pancakes (my 4 year old's birthday breakfast)
Dinner - Out for birthdays
Sunday - Breakfast - Baked Donuts and Fruit
Dinner - Honey Walnut Shrimp and Rice (This is a new recipe we are trying.)
Hope y'all have a great week!
Friday, April 4, 2014
Easy Homemade Oreo Cookies
These are a favorite quick and easy dessert for guests or just when you get a hankerin' for something sweet! They just happen to be a favorite of the hubby! He loves all things "Oreo"! I swear to y'all it is really hard to eat just one! The best thing about the recipe is that the cookie has only 3 ingredients and the frosting only has 4. How could it get any better than that?!
Easy Homemade Oreo Cookies
Cookie Ingredients:
2 packages Devil's Food Cake Mix
1 cup vegetable oil
4 eggs
Filling Ingredients:
1 package (8 oz.) cream cheese, softened
1/4 cup butter, softened
2 1/2 cups powdered sugar
1 teaspoon vanilla
Directions:
In a mixing bowl, combine cake mixes, oil, and eggs; mix well. Roll into 1 inch balls. Place 2 inches apart on ungreased baking sheets. Do not flatten. Bake at 350 for 8-10 minutes or until set. Cool for 5 minutes before removing to wire racks (cookies will flatten as they cool). In a small mixing bowl, beat cream cheese and butter. Add sugar and vanilla; beat until smooth. Spread on the bottom half of the cookies; top with remaining cookies. Store in fridge or freezer.
Recipe Source: Shalae Barney (my SIL)
Tuesday, April 1, 2014
Some of my Favorite Food Storage Items!
For the past 4 months, I have slowly been trying to organize my pantry. It is a work in progress y'all! But I do have to say that my favorite things in my pantry are these gals! Allow me to introduce you! These babies hold all my flour and sugar and have made cooking just a tad bit cleaner. Let's face it...I am in the kitchen a lot. I am cooking for 3 kids and my guy. If I need some flour or sugar, I just roll one of these babies out, pop the lid open, and start a scoopin'!
Here's my sugar baby! Doesn't she look good all full o' sugar! Oh yes, she does!
Here's the flour girl! I couldn't let her be left out. I do make sure these empty completely each time before I refill them.
I loved sugar baby and flour girl so much that I bought a 3rd one for all my other sugars (brown, powdered) and a few other things like coconut.
I found these little babies at The Container Store. I read tons of reviews and they are air tight. They really work like a charm. I love them!!! They have helped to tidy up the pantry like nobody's business!
Anyone have any more tips on things to help organize the pantry?? What is your favorite storage item??
Labels:
food storage
Thursday, March 27, 2014
Luscious Lemon Bars
Where do you begin when you haven't been in the blogging world for years? That is the question. I took this picture 8 months ago in hopes of posting it on the blog due to two dear friends. They told me they wished that I would start to post again on my blog. Honestly, I wished I would too. I love having my recipes online. It makes them so easy to access and share with others. So here it goes people...
Honestly, this recipe is one of the best for Lemon Bars. It was a little like heaven in a pan. The secret ingredient....coconut. Those who abhor coconut will think I am crazy, but oh, you friends out there that love, like, or even tolerate coconut...watch out! You may just eat the whole pan. They are so delectable!
Luscious Lemon Bars
1 cup flour
1/2 cup margarine
1/4 cup powdered sugar
Melt butter, pour it over the flour and sugar and mix ingredients together. Pat into 9x9 inch pan and bake for 20 minutes at 350 degrees.
2 eggs
3 Tablespoons lemon juice
a little grated lemon rind
3 Tablespoons flour
1 cup sugar
1/2 teaspoon baking powder
1/2 cup coconut
Beat eggs and lemon juice and rind. Add rest of ingredients and mix well. Pour on top of baked crust. Bake 25 minutes at 350 degrees. When done sprinkle with powdered sugar. Cut when cool. Devour!!!
Recipe Source: My Momma
Sunday, May 20, 2012
Ham and Swiss Poppy Seed Sliders
I wanted to try this recipe because it looked like such a quick and easy dinner. Plus, I am a sucker for a sandwich. Not only was the dinner prep simple, these were delicious. I had to take a quick picture with my phone because we had to put them on the blog before they got gobbled up. I can't wait to make this for our next party as an appetizer. They are soooo good. Even my kids liked them. When the whole family is eating, that is success!!!!
Ham and Swiss Poppy Seed Sliders
The Slider
Ingredients:
24 good white rolls
24 pieces good honey ham
24 small slices Swiss cheese
1/3 mayo
1/3 cup miracle whip
Poppy Seed Sauce
Ingredients:
1 1/2 TBSP poppy seeds
1 1/2 TBSP yellow mustard
1 stick butter, melted
1 TBSP minced onion
Recipe Source: The Sister's Cafe
1/2 tsp. Worcestershire sauce
Directions:
In a small bowl, mix together mayo & miracle whip. Spread onto both sides of the center of each roll. Place a slice of ham & a slice of swiss inside of each roll. Close rolls & place into a large baking dish or heavy cookie sheet, very close together.
In a medium bowl, whisk together all of the poppy seed sauce ingredients and pour evenly over all of the sandwiches. Let sit 10 minutes, or until butter sets slightly. Cover with foil & bake at 350 for 12-15 minutes or until cheese is melted. Uncover & cook for 2 additional minutes and serve warm.
Recipe Source: The Sister's Cafe
Friday, April 13, 2012
Apple Streusel Bread
This bread is absolutely fantastic. It has just the right amount of apple and the perfect combination of flavors. We love it. I love to make bread into mini loaves so I can give some away so I don't eat it all because trust me, I can and will do it. Be sure if you make smaller loaves to decrease the baking time.
Apple Bread:
2 cups flour
1 teaspoon baking soda
1/4 teaspoon salt
1/2 cup butter, softened
1 cup sugar
2 large eggs
1 tablespoon lemon juice
2 teaspoons vanilla extract
2 granny smith apple, peeled and diced
Streusel Topping:
2 tablespoons flour
2 tablespoons granulated sugar
1 teaspoon ground cinnamon
1 tablespoon butter
2 tablespoons brown sugar
Directions:
1. Preheat oven to 350.
2. To prepare topping, combine flour, granulated sugar and cinnamon in a small bowl. Cut in butter until crumbly. Set aside.
3. To prepare bread, combine flour, baking soda, and salt in a medium bowl.
4. Cream butter and sugar in a mixing bowl. Beat in eggs, lemon juice and vanilla.
5. Add the flour mixture to the butter mixture and stir just until moistened. Add apples and stir gently to combine.
6. Spoon half of the batter into a buttered 9-by-5 inch loaf pan. Sprinkle with half of the topping. Spoon remaining batter into the pan and sprinkle with remaining topping. Finish by sprinkling evenly with brown sugar.
7. Bake for 55-60 minutes, or until a wooden pick inserted in the center comes out clean. Remove the bread from the pan and set on a rack to cool. Makes 10 servings.
Recipe Source: The Costco Cookbook
Saturday, April 7, 2012
P.F. Chang's Mongolian Beef Copycat Recipe
So I can't say that I have actually eaten this beef at P.F. Chang's, but regardless, this recipe was really good. Plus, it's so quick and easy to make. My whole family enjoyed it. The sauce didn't thicken up for me as much as I would have liked, but the end result was still delicious. We will definitely be making this again.
P.F. Chang's Mongolian Beef Copycat Recipe
Ingredients:
2 teaspoons vegetable oil ½ teaspoon ginger, minced
1 tablespoon garlic, chopped
½ cup low sodium soy sauce
½ cup water
¾ cup dark brown sugar
vegetable oil, for frying (about 1 cup)
1 lb flank steak
¼ cup cornstarch
2 large green onions, chopped
Directions:
Sauce:
Heat 2 tsp. of vegetable oil in a medium saucepan over medium/low heat. Don't get the oil too hot.
Add ginger and garlic to the pan and quickly add the soy sauce and water before the garlic scorches.
Dissolve the brown sugar in the sauce, then increase the heat to medium and boil the sauce for 2-3 minutes or until the sauce thickens. Remove it from the heat.
Beef:
Slice the flank steak against the grain into 1/4" thick bite-size slices. Tilt the blade of your knife at about a forty five degree angle to the top of the steak so that you get wider cuts. Dip the steak pieces into the cornstarch to apply a very thin dusting to both sides of each piece of beef. Let the beef sit for about 10 minutes so that the cornstarch sticks. As the beef sits, heat up one cup of oil in a wok (you may also use a skillet for this step as long as the beef will be mostly covered with oil). Heat the oil over medium heat until it's nice and hot, but not smoking. Add the beef to the oil and sauté until brown. Stir the meat around a little so that it cooks evenly. After a couple minutes, use a large slotted spoon to take the meat out and onto paper towels. Dab excess oil off meat with a paper towel and add to medium saucepan with the sauce in it. Put the pan back on the oven over medium/low heat. Add chopped green onions and let sauce simmer until warm. Serve over rice.
Recipe Source: Six Sisters' Stuff
Labels:
beef,
copy cat,
gluten free,
main dish,
rice,
wheat free
Monday, April 2, 2012
Baked Chocolate Cake Donuts (Gluten Free and Dairy Free)
So my sweet sissy and niece are visiting me for the week from Las Vegas. My sister found out a couple of years ago that she can't eat gluten or dairy along with a few other food items. So I created this donut recipe exclusively for her. I have to say, these were really good. We all really liked them and my sis was overjoyed to have something made especially for her.
Chocolate Cake Donuts (Gluten Free and Dairy Free)
Makes 6 donuts
Ingredients:
1 cup oats, ground into a fine powder (You can use a food processor or blender.)
1/4 cup unsweetened cocoa powder
1/2 teaspoon baking soda
1/4 teaspoon salt
1/2 cup vanilla soy milk
1/2 cup packed dark-brown sugar
1 egg
4 teaspoons vegetable oil
1 teaspoon vanilla extract
Directions:
1. Heat oven to 325. Coat donut pan with nonstick cooking spray.
2. In large bowl, whisk oat powder, cocoa, baking soda and salt. In small bowl, whisk soy milk, sugar, egg, oil and vanilla until smooth. Add soy milk mixture to oat mixture; whisk until blended and smooth.
3. Batter is more liquidy than firm. Spoon batter into donut pan, filling until 2/3 full. Bake at 325 for 13 minutes. Cool in pan on rack 3 minutes, then carefully turn out directly onto rack to cool.
For chocolate-frosted donuts: Combine 1 cup powdered sugar, 1 tablespoon cocoa and 2 tablespoons vanilla soy milk. Stir until smooth. Dip cooled donuts into bowl and allow excess frosting to drip back into bowl. Transfer to rack. Top with sprinkles, coconut or mini chips, if desired.
Recipe Source: Kimmy's Creation
Labels:
breakfast,
brunch,
dairy free,
dessert,
gluten free,
wheat free
Thursday, March 29, 2012
Shauna's Banana Bread
I am not the biggest fan of banana bread because I am not the biggest fan of bananas, but this bread, oh my, is one of the best banana breads I've ever tasted. My dear friend, Shauna, would invite us over all the time for banana bread when we lived in Portland. Then she would send us home with a loaf. What a dear, dear woman. This is a family favorite!
Shauna's Delicious Banana Bread
Ingredients:
1 1/4 c. sugar
1/2 c. butter, softened
2 eggs
3 or 4 smashed bananas
1 tsp. lemon juice
1/2 c. milk
2 tsp. vanilla
2 1/2 c. flour
1 tsp. baking soda
1 tsp salt
Directions:
Preheat oven to 350 degrees. Cream together sugar and butter. Then mix in eggs, bananas, lemon juice, milk, and vanilla. Add the remaining dry ingredients, beat until smooth. Pour into greased pans. This makes two large loaves of banana bread. Bake large loaves for 1 hour or until toothpick inserted in center comes out clean. Don't overbake! Bake for less time if you make smaller loaves of bread.
Recipe Source: Shauna Nemelka
Saturday, March 17, 2012
Overnight Crock Pot Oatmeal
There is nothing better than waking up to an already cooked breakfast. This was so easy to prep the night before, and I even got to sleep in. I just told the hubs breakfast was in the crock pot and he took care of the rest. My 4 year old little lady chowed down on this. She ate 3 bowls for breakfast. (They were kid size bowls mind you.) Then she had another bowl for lunch. It was a really delicious and filling breakfast.
The idea behind this oatmeal is that you create a double boiler with your crock pot. The oatmeal ends up so creamy. Seriously, it is a great way to cook up some oatmeal.
Overnight Crock Pot Oatmeal
Ingredients:
1 - cup steel cut oats
4 - cups water
(if using a slow cooker liner decrease the water to 3 1/2 cups)
1/2 - cup half and half or milk
1 - cup dried fruit of choice, optional
(apples, raisins, cranberries, apricots etc)
1/4 - cup brown sugar
1 - tablespoon butter
1/2 - teaspoon vanilla extract
2-3 tablespoons cinnamon sugar
Directions:
First off, find a glass bowl that will hold four cups of liquid, and fit inside your crock pot with the lid on. Measure out one cup of Steele cut oats. Pour that into the inner bowl. Add the four cups of water, milk or half and half, brown sugar, vanilla, butter and cinnamon sugar. If you would like to add dried fruit or a cut up apple add it as well. Fill the crock with water to about halfway.
Set the inner bowl in the crock pot and see how high the water rises. Add more water in the crock pot if necessary. Try to match it so that the water reaches about the same height on the outside of the oats bowl or just below the bowl. Place the lid on your crock pot. Set on low and go to bed. When you get up the next morning your oatmeal should be cooked perfectly in that steamy water bath. Serves 4-6.
Recipe Source: Mommy's Kitchen
Labels:
breakfast,
brunch,
crock pot,
gluten free,
wheat free
Subscribe to:
Posts (Atom)